3D Photogrammetry
Background
Photogrammetry involves taking overlapping, precise photos of the object being digitized. This usually involves using a digital single lens reflex camera - usually called a DSLR, often in manual mode, to create a precise set of overlapping images.
- Key Settings
- Necessary Equipment
- Views and Levels
- Camera Fundamentals
- Photogrammetry Steps
- Foldio Notes
- Evaluating Photos
- Adding Photogrammetry Photos to OneDrive
Those who aren’t familiar with manual studio photography should review the following links:
- Photo basics video on YouTube
- Manual mode cheat sheet how-to guide
- What is aperture video
- What is ISO
- What is shutter speed
Key Settings
Now that you’ve familiarized yourself with these concepts, keep in mind these settings for our purposes:
-
We aim for an F-Stop around F/8 - F/11.
-
Our ISO must be below 400, ideally at: 200, 250, or 320. Do not go above 320 without consulting the Digitization Manager. In Manual mode, ISO set at 100 has worked consistently and changing the Fstop and shutter speed to reach desired lighting goals.
-
Our shutter speed is usually 1/40 or 1/60. Anything slower than 1/40th is too slow and more light needs to be added, a lower F-stop used, or a higher film speed used. In Manual mode, anywhere in the range of 1/15 - 1/60 works well
-
Remember that the camera needs to stay in remote operation mode to be controlled by the Foldio app. Once put into this mode, the camera should stay in it unless the mode is cleared. This setting should already be in place when you start taking pictures and is here largely for reference.
-
Shooting in Aperture Priority Mode is recommended. Manual mode has been used for most of the project, sucessfully. The freedom to change all settings around to suit a specific artifact is very helpful.
-
Make sure to position the turntable with the zero degree mark facing the front of the shot.
-
Make sure to use the Start and Stop cards for each Level; otherwise it is very confusing to sort the files later.
-
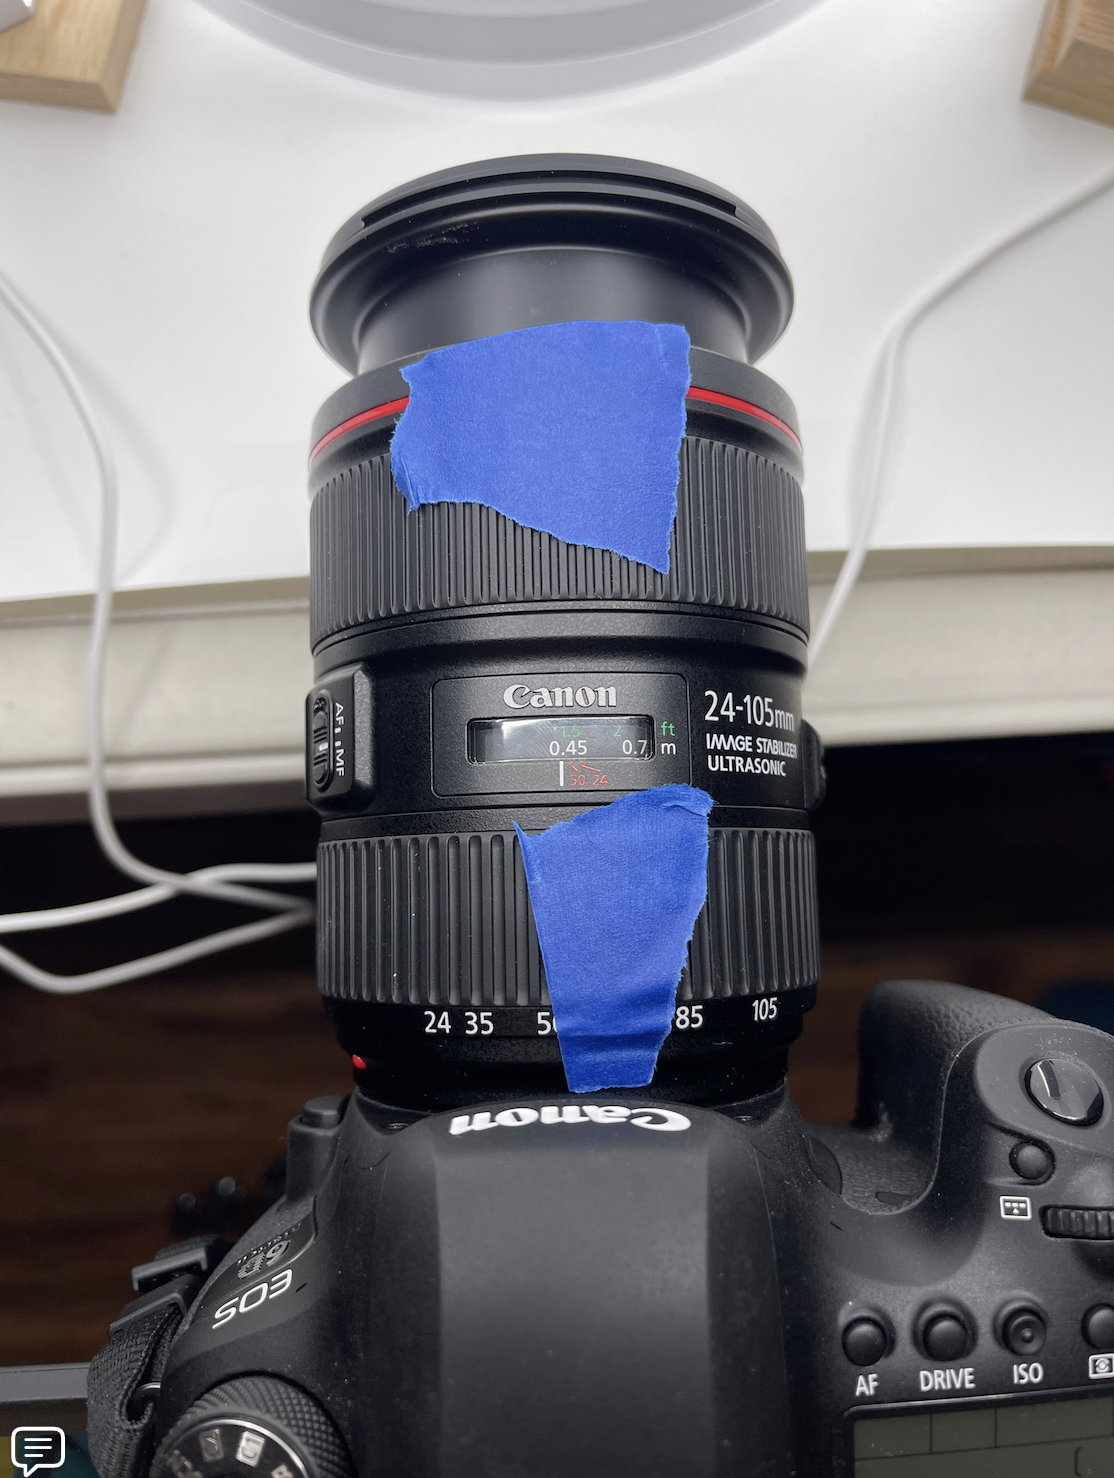
For beginner’s taping the lens in place once key settings like focused and zoom are established can be helpful.
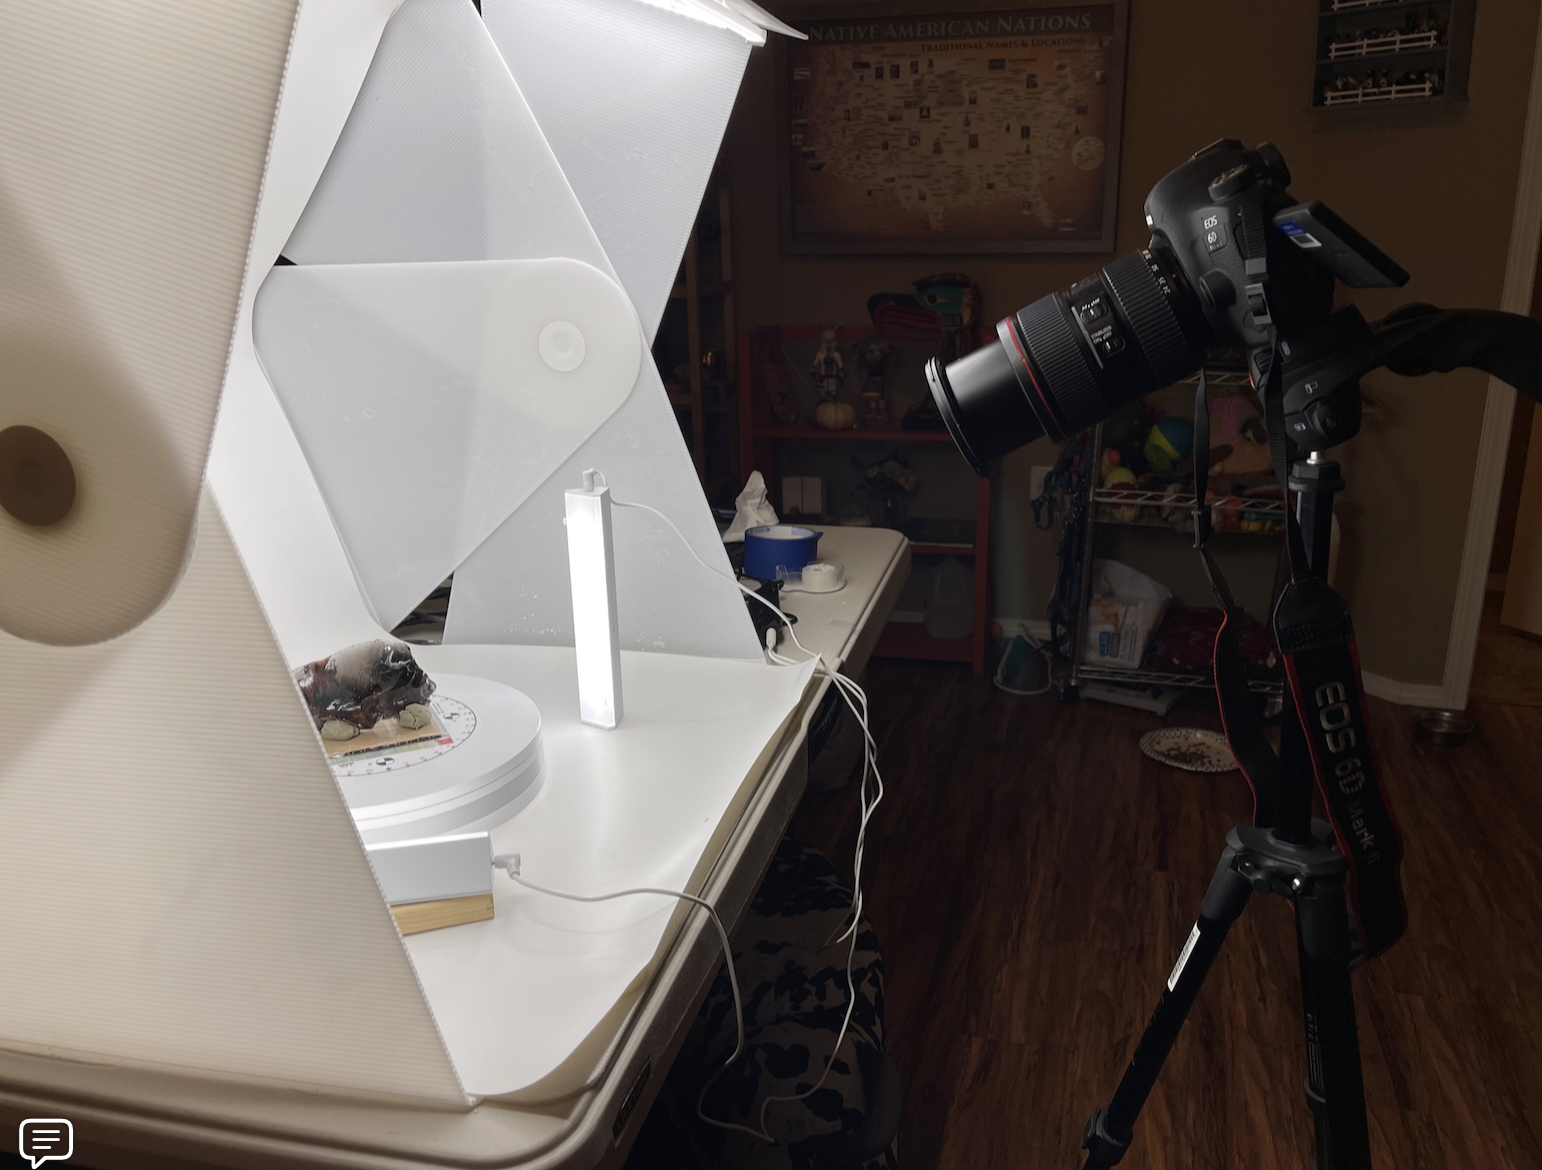
Necessary Equipment
- DSLR Camera
- Tripod
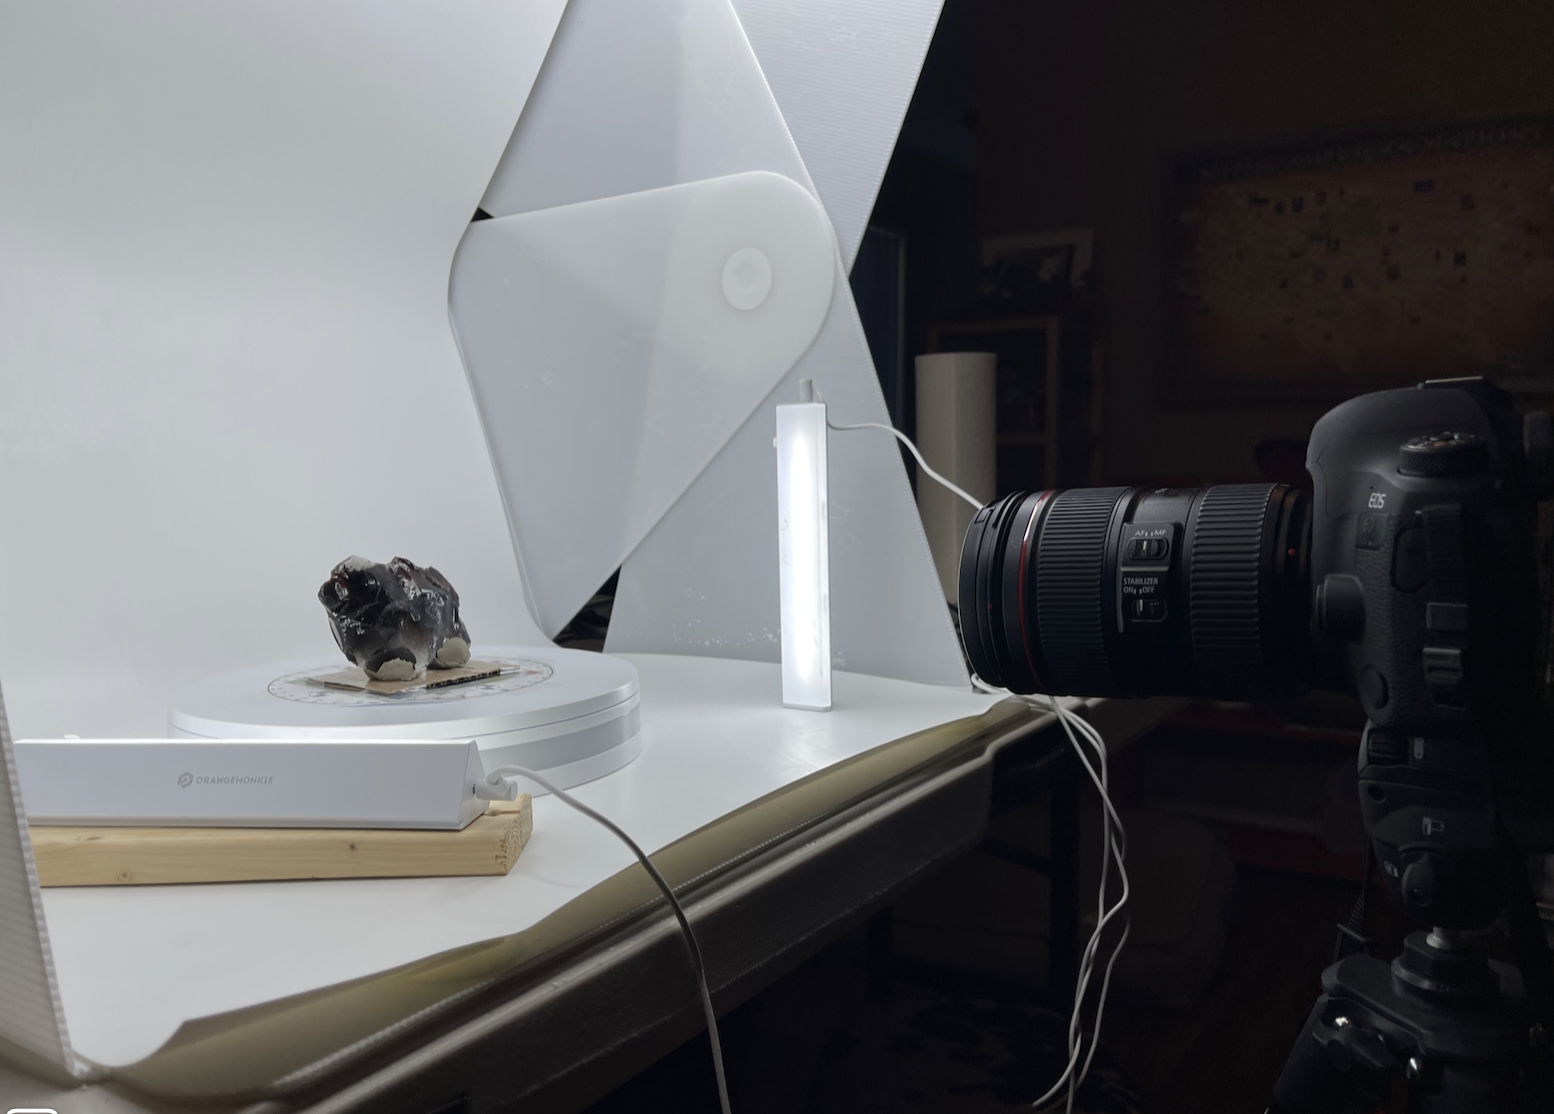
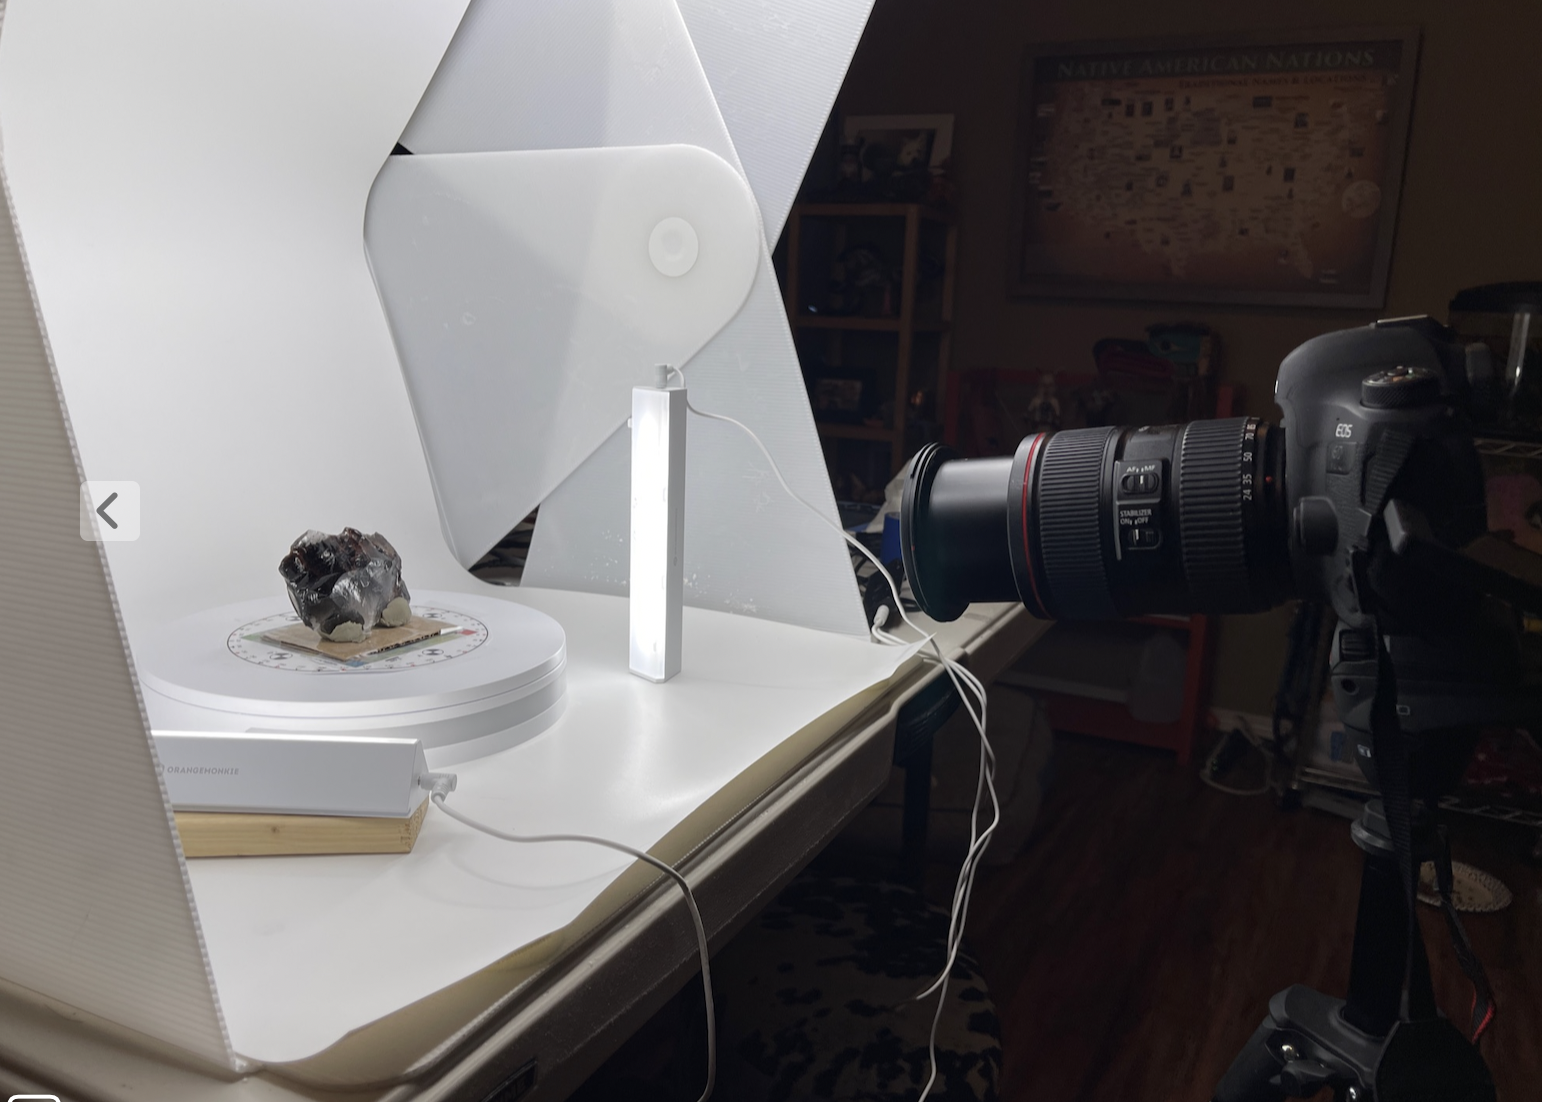
- Foldio studio set with photobooth that includes the backdrop, lights, extra lights, and turntable
- IPad with Foldio App configured
- Level (optional)
- Blue Painter’s tape
- Artifact
- Clay/Rubber eraser
- Dusting medium and materials
- Transport tray/plate for transporting artifact from dusting space to studio
- Mini wooden blocks for adjusting lights
- Start, Stop, and ERROR cards
- Tape measure or ruler
Views and Levels
We will need to take 6 sets of photos, each with 360 degree rotation in order to fully capture the artifact and create a 3D model. To help keep track of these sets and the files we will create in each of them, we will use the same terminology throughout the process:
Views
This refers to the object’s orientation. Each shoot will have a View 1, where the object is “right side up,” and a View 2, where the object is flipped “upside down.” Many of our objects don’t have an obvious “right side up,” so View 1 always means the first orientation we shoot with. While View 2 always means the flipped opposite, or “upside down” version, of that orientation.
Levels
Levels refers to the camera’s height. For each View of the object (aka orientation), we need to take shots at 3 different camera heights, referred to as Levels 1, 2, and 3 respectively. Level 1 is always the horizontal shot, Level 2 is always the medium height shot, and Level 3 is always the highest shot.
Once you finish taking photos of an artifact, you will have the 6 sets of photos below:
- View 1: Level 1
- View 1: Level 2
- View 1: Level 3
- View 2: Level 1
- View 2: Level 2
- View 3: Level 3
Camera Fundamentals
For high quality results, you want to take every photo with exactly the same camera settings so the photographs are consistent when you start working with them in Agisoft Metashape, the software we will use to build the 3D models.
This means: 1) keeping the object and camera in the same position every time you take a photo so that the object is consistently framed in the photograph (although the height of the camera will change across each level), and 2) adjusting the settings on your camera so that the color, focus, capture settings are the same for every photo.
It is important to have a general understanding of how different settings on the DSLR camera can impact your photographs. The following steps will help you set up the camera to produce the crispest image possible with accurate color representation.
Basic Camera Settings
All cameras
- Set the camera to shoot in RAW and JPEG
- Set mode to Manual
- Or for beginners, try using Aperture priority—AV on a Canon.
- Set to never turn off
- Tape the lens down with painter’s tape to hold zoom level in place
- If the lens has ‘image stabilization’ or ‘vibration reduction,’ turn it OFF (usually a switch on the lens itself)
- If no SD or CF card is present, set the camera to not shoot
Most of the settings described above have already been set on the camera and will be retained throughout shooting (including power down and power off) unless changed. In general, the only camera settings that may need changed are the aperture (F-Stop), exposure, shutter speed, and ISO (film speed).
Staging and Camera Adjustments Overview
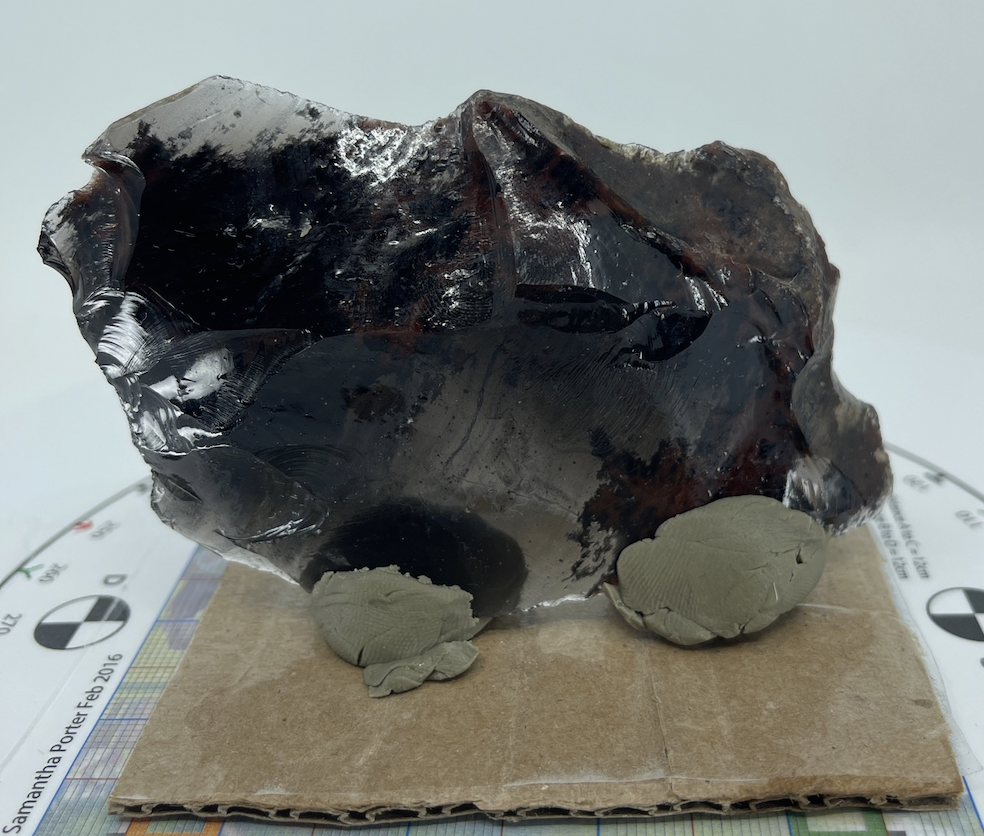
You will begin by putting your dusted artifact onto the center of the turntable. Push down on the base of the adhereing clay/rubber eraser to make sure there is firmly attached to the turntable. If the object falls over, you will have to re-take the photos from that level and any proceeding levels from that view, as well as likely re-powder it. For example, if the object fell over on View 1: Level 3, you would need to repowder it then retake the photos for View 1: Level 1, View 1: Level 2, and View 1: Level 3.
Each artifact will have 6 complete rotations taken. The first set (View 1) are 3, 360 degreee views of the object, taken from 3 different heights (Levels 1-3). We then flip the object upside down, which involves re-powdering and re-attaching it with clay to the turntable, and repeating the process, completing 3 (View 2), 360 degree views of the object, taken from 3 different heights (Levels 1-3). The end result for each object will be six folder sets that contain the photos comprising each view and level.
For this process to work correctly, we must keep as many variables consistent across these six complete rotations as posisble.
Below are details of the settings that will change and when:
These settings will stay the same for the whole shoot (all Levels in both Views):
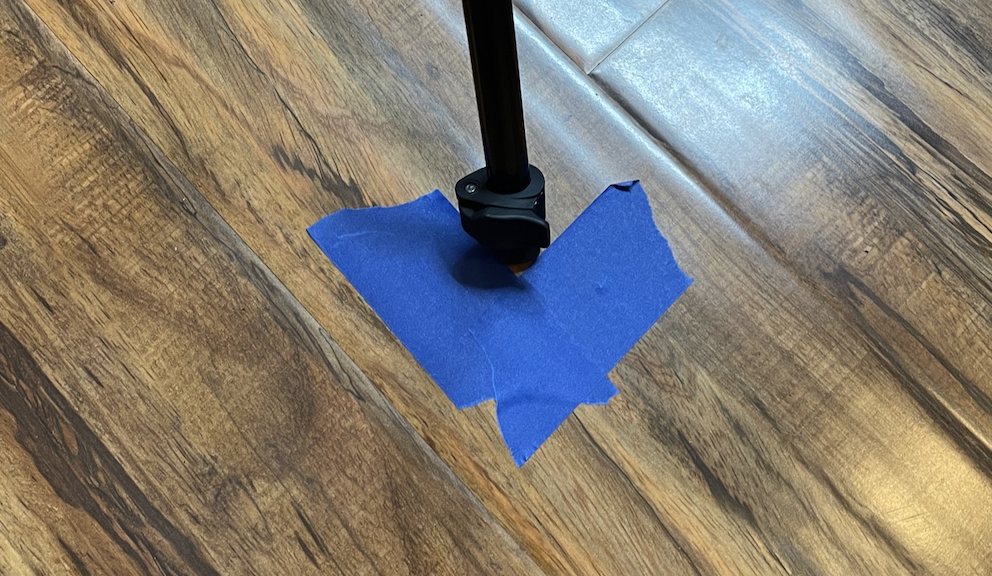
- Positioning of the feet of tripod (aka we cannot move the tripod closer or further)
- exposure set using below settings (aim for even or slightly over exposed)
- ISO/film speed
- Aperture/F-Stop
- Zoom/focal distance
Practically these settings mean once we start shooting an artifact, we cannot change the zoom of the camera, either intentionally (to capture more or less of the object) or by accidentally bumping it. We also cannot use a mode that automatically changes the Aperture/F-Stop. The ISO is the least likely to be changed inadvertently over the course of the shoot.
These settings will change for each Level of the shoot
- The height of the camera (horizontal, medium, high)
- The camera focus for each level (horizontal, medium, high); once you set the camera focus for a View and a Level (like View 1: Level 1), it must remain consistent throughout all pictures at that Level
- As discussed in Step 9 below, you will manually set/reset the focus before taking photos at each level
- Do not use autofocus
Photogrammetry Steps:
- Place the object into center of turntable and scurely adhere to the base with clay. Vertically placing the object has resulted in best results.
- If the object falls over you must restart the whole series for that View (aka redo all three heights).
- Power lights up to maximum brightness using the controller and move them to light the object.
- Position the camera so it is exactly level with the object (View 1: Level 1).
- Adjust camera settings:
- Adjust the camera to Aperture priority mode and set the aperture to F/11 or F/13
- Set the exposure to one stop over the “ideal/target” exposed range. In this mode the camera will hold the Aperture at the set point (F/11 or F/13) and then automatically adjust the shutter speed to create an image that is one stop over the default middle exposure.
- Make sure the shutter speed it’s thinking it will use makes sense and is not below 1/30th of a second. If it is, that usually means the lights aren’t close enough.
- Test how well the camera is focusing by using the autofocus and seeing how many points register as focusing by half way depressing the shutter or touching the touch screen.
- If not enough appears to be in focus, adjust the tripod’s distance from the camera or adjust the zoom on the camera. Do not go below 24mm on the zoom. Expect to have the zoom set to around 50-75mm most of the time.
- Once you have achieved satisfactory focusing options, test that the tripod distance will work at the more extreme angle by raising the tripod to the max height and more extreme top down view angle.
- Once you have a good balance of zoom and tripod distance that gets the whole object with as many focus points as possible at both the extreme ends of the sequence (the horizontal view and the max upright view), use tape to mark the tripod’s foot placement and to hold the camera’s zoom.
- Test that there is enough lighting by taking a few test shots and confirming that the camera is shooting at 1/40 or faster
- If you see the camera is doing a lower setting, motion/blur can be introduced by the longer shutter times and you need to get more light.
- Set the camera to manual focus
- The easiest way to do this while getting sharp focus throughout is to have the camera in Autofocus mode then take a picture with that setting first. Then, without moving the focus rings, set the lens back to manual focus.
- Your shot should now be at the same autofocus exposure, but set in manual mode. What this means is that the camera won’t autofocus on each turn of the base, but instead preserve that original focus throughout.
- Open the Foldio App and ensure the camera is connected by clicking Test Shot.
- If you’re using the system for the first time, you may need to connect to the foldio turnable (under settings). Once connected, click the Camera 360 setting and under “Camera Brand” select Canon. Click “Test Shot” and confirm that the camera has taken a picture.
- Put the appropriate start card in the picture and use the “test shot” foldio button to take the shot. Then click the autorotate button.
- If you hear a focusing beep for each rotation of the turntable this is a hint you have accidentally left the camera in autofocus mode and need to reshoot that level after switching from autofocus to manual!!
- Allow the foldio turntable to complete a full 360 degree rotation of the object.
- Put the appropriate stop card in the picture and use the “test shot” foldio button to take the shot to complete the shooting for View 1: Level 1.
- Move the camera to a medium height setting, about halfway up the pole that raises the camera head up. Picture
- To achieve medium height setting move camera all the way and mark the middle with a piece of tape, leave tape in place for View 2: Level 2 photos. Then move the camera down to where the tape was placed.
- Repeat Step 9 (the focusing step) by switching to Autofocus and then back to manual. DO NOT CHANGE THE APERTURE or any other settings.
- Repeat Steps 11-12 and use the foldio app to make a 360 rotation at this Level (View 1: Level 2).
- Put the appropriate stop card in the picture and use the “test shot” foldio button to take the shot to complete the shooting for View 1: Level 2.
- Move the camera to a highest height setting; make sure to raise the camera as high as possible without moving the tripod feet
- Repeat Step 9 (the focusing step) by switching to Autofocus and then back to manual. DO NOT CHANGE THE APERTURE or any other settings.
- Repeat Steps 11-12 and use the foldio app to make a 360 rotation at this Level (View 1: Level 3).
- Put the appropriate stop card in the picture and use the “test shot” foldio button to take the shot to complete the shooting for View 1: Level 3.
- Flip the artifact “upside down” and re-powder
- Start the process over from the horizontal level height or start from the Level 3 height (essentially going backward down the levels)
- Be sure to:
- Refocus the camera for each level
- Keep all other settings the same as View 1 - Reminder: When get to View 2: Level 2 (medium height), make sure to set the tripod close to the same height you used in View 1: Level 2 - reference the height you noted form View 1 - Level 2 and attempt to bring the tripod close to that same height.
If something goes wrong part of the way through a Level, take a photo of the ERROR card and then start that Level over. If the object falls over you need to repeat all levels for that View.
Foldio Notes
- Make sure you are using the 24 photos setting.
- Make sure you have positioned the turntable with the zero degree mark facing the front of the shot BUT DO NOT move it if you have already taken shots.
- The foldio has a setting that accounts for the delay in communicating with the camera.
- If you notice the camera can’t keep up with how fast the base is turning, contact the Digitization Manager about how to change that timer to a longer amount.
- This can also mean there is a setting off with the camera as the set delay speed should work well with anticipated shutter speeds.
Evaluating Photos
Whenever you have a change in the set-up, take a few sample photos and check them on the view screen. Things to check:
- Is the object in focus?
- Is the depth of field deep enough? (You can tell this by how many focus points are available to the autofocus)
- Check your lighting: Is the object casting any dark shadows or bright glares?
- Are the lights in the shot?
- Is the image too dark or too light?
- Is your camera and tripod positioned such that the entire object is visible, and the edges of the lightbox aren’t visible in the frame?
- Is the dusting on the object even and absent of any fingerprints?
- Is the object centered on the turntable so that when you rotate it, it will stay centered in your frame?
Adding Photogrammetry Photos to OneDrive
Images taken during photogrammetry will need to be transferred from the memory card to the Desktop, from the desktop into your personal OneDrive with correct folder structure, then uploaded to the 3D Artifact Photos folder in the AWBLA OneDrive. Visit the Processing page for instructions on how to add photogrammetry photos to OneDrive.
This documentation was adapted with permission from the creator Julia Haines’ Photogrammetry Workflow using a DSLR Camera (The University of Virginia Library Scholars’ Lab).
Citation: Julia Haines. “Photogrammetry Workflow using a DSLR Camera” [blog post]. Published September 24, 2019, University of Virginia Library Scholars’ Lab. https://scholarslab.lib.virginia.edu/blog/documentation-photogrammetry/. Accessed on August 25, 2021.