2D Photography
Photography
Before you start: Refer to page 2 in Nikon D800 Manual for “Getting to Know the Camera” to learn about the camera you are about to use. These pages are printed and hung by the 2D station for reference.
Important terminology
      All items below are highlighted on printed sheets of the manual in the photo room

      WB button p. 1, #5
      Power switch p.1, #10
      Shutter release button (we use a remote) p.1, #11
      Control panel p. 1, #15

      Sub-command dial p. 2, #2
      FN button p. 2, #4
      Battery slot p. 2, #6

      Ten-pin remote terminal p. 3, #8

      Main dial p. 4, #7
      Multi-selector p. 4, #8
      SD Card slot p. 4, #9
      LV mode p. 4, #12
      Zoom-out button p. 4, #18
      Playback button p. 4, #23
Daily camera set-up
Insert SD card into SD Card slot, turn on camera using the power switch, make sure battery is charged and insert it in the battery slot.
Turn on LV mode and follow the steps below. These steps will need to be REDONE each time the camera is turned on
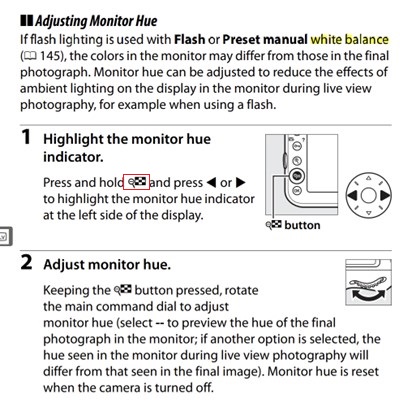
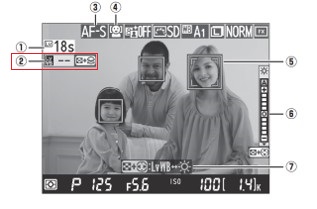
Here are the above steps in a different way: Looking at the camera’s monitor
- Press and hold the Zoom-out button, move arrow keys on the multi-selector until box 2 (as indicated on the image below) is highlighted in yellow, it may already be highlighted, if it is, move to the next step
- Keeping the Zoom-out button pressed, turn the main dial until it shows “PRE” (turn dial left once)
Then set the correct White Balance (WB) preset (“PRE”) based on the color background you have. You will need to reset the WB every time a new background color is used. Walk around the table so you can see the Control panel
- Press and hold the WB button and scroll through the options with the sub-command dial
WB Presets
- D-1 = black
- D-2 = white
- D-3 = gray
Taking the shot
Make sure you:
- Use the lint roller or canned air to clean any dust off the background felt, this may need to be done more than once a session.
- Wear gloves when using the white background.
- Use kneeded eraser/modeling clay to hold artifact for the photo if needed.
- Only use LV mode when positioning new object, otherwise TURN OFF. It drains the battery and slows the photo taking process.
- Turn on remote shutters: 6. Turn on the two Pixel Pro Wireless Remote Controls by pressing and holding the On button till screen displays “CH 01”. 7. Use large button to focus, push down half-way and hold, finish pushing down to take the photo. 8. On LV the red box will turn green and a beep will sound when focus is achieved.
General Set-up
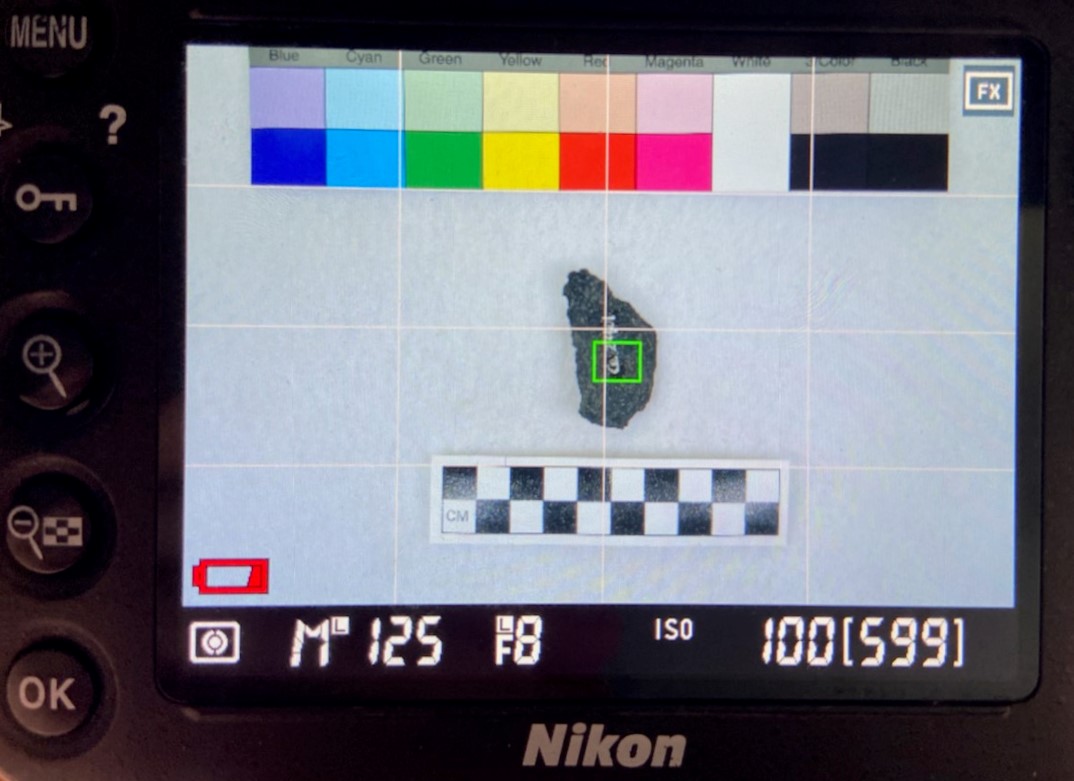
Small artifacts
- To set-up turn on LV
- Keep both scale and color bar horizontal and lower the camera to the appropriate level and adjust as needed.
- Align artifact in center of CM scale and ensure it is straight, use camera gridlines to help.
- Move red focus box (green in the photo example) to center of artifact using multi selector
- Turn OFF LV mode
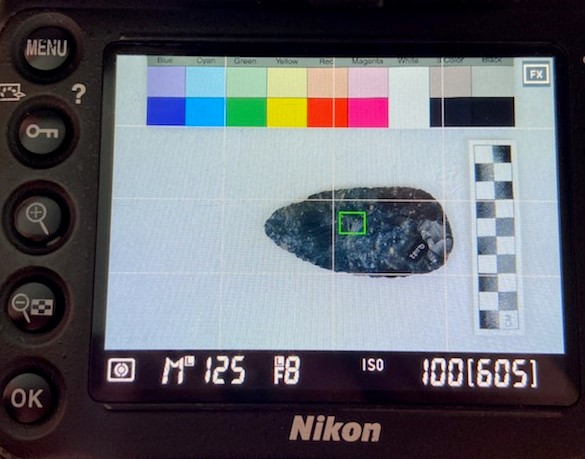
Large artifacts
- To set-up turn on LV
- Color bar remains horizontal and CM scale can be moved vertically
- Align artifact in center of scale and ensure it is straight, use camera gridlines to help.
- Move red focus box (green in the photo example) to center of artifact using multi selector
- Turn OFF LV mode
Taking photos
Each drawer will have a printed list of all artifacts to keep track of your progress.
- Always photograph the side of the artifact with the catalog number FIRST.
- If it is not visible, write “cat #” on the small “whiteboard” and include on first image, then remove and photograph artifact.
- Photograph both sides of artifact and ENSURE that the orientation is the SAME for front and back, just flip it over, DO NOT rotate
- If another view is needed to understand the artifact, please photograph this view and refer to naming convensions below.
-
If you do not know how the artifact should be placed, check out the cheat sheet or ask for help.
- Keep CM Scale as straight as possible, use gridlines on camera (LV) to help.
- The color bar and the CM scale need to be in each photograph, the gray portion of the color bar can be cut out to achieve a closer image
- Use best judgments when choosing background color, it is always okay to try on multiple colors.
- It may be easier to photograph all artifacts that need white background and then switch colors.
- Use the printed list to keep track of which artifacts have been photographed.
Just in case
If things get out of order refer to this section to reset the camera to our preferred settings
Prior to shooting, make sure Manual Mode is selected, shutter speed is 125, the f stop is 8, and ISO is 100. All should be set and locked with these settings and should remain the same even after camera is shut off. For details on changing these, see below.
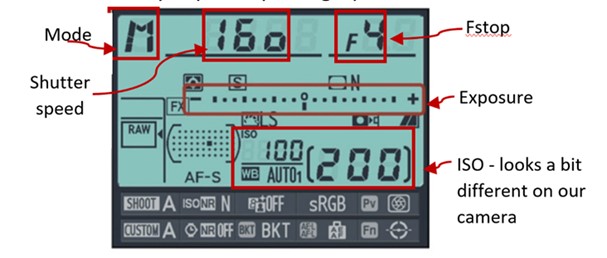
Mode: Manual Mode (M on camera)
- To change hold “MODE” button down, above LED screen and rotate dial near right thumb (main dial)
ISO: 400-100, most likely 100
- To change ISO - hold ISO button on left side dial and turn dial near right thumb (main dial)
Fstop: F8
- To LOCK/UNLOCK settings, press and hold FN button and rotate the sub-command dial until an “L” appears/disappears by the shutter speed
- Hold shutter button half way down (like you are focusing a shot) and turn the dial directly below the on/off switch on the front of the camera
Shutter speed: 125 - 80 depending on background color
- To LOCK/UNLOCK, press and hold FN button and rotate main dial until an “L” appears/disappears by the shutter speed
- To change – hold shutter button down half way, same as above, and rotate main dial